In this Release we have given the Bank Reconciliation tool a serious work-over in order to make it easier to do bank rec’s – both manually and using an electronic version of the bank statement details. Firstly, the following changes have been made to the basic reconciliation input functions:
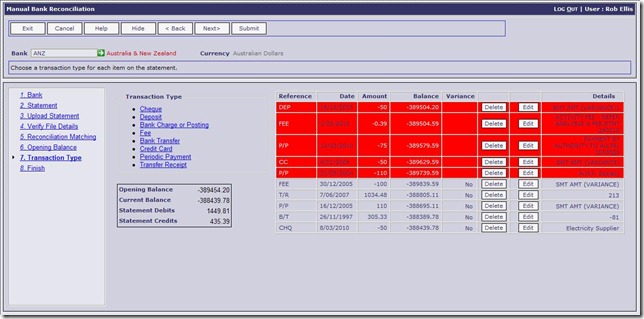
- A “delete” icon has been added to the main display of reconciled items to allow an item to be removed
- An “edit” icon has also been added to enable changes to be made to a selected item
- Adjusted the “View Reconciled Items” at the Finalise step to allow multiple report launching
- Users can now change the “Transaction Type”, Amount, Date, Reference and Details as they go
- Bank Charges/Postings can be edited and all details adjusted after initial entry
The sample screen shot above show the new “delete” and “edit” functions, along with the highlighting of transactions that have not been matched automatically by the tool.
Above you can see how an individual line can be edited and adjusted as required.
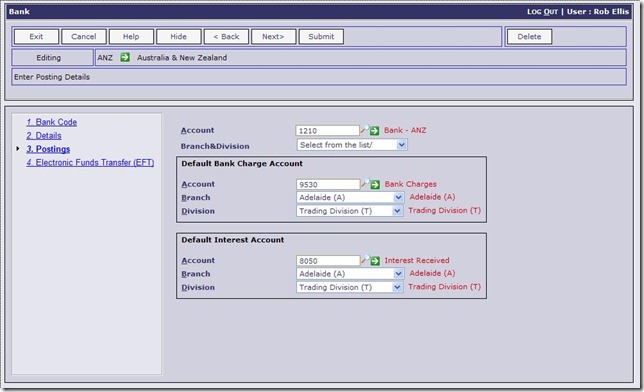
Additionally default GL postings for “Bank Fees” and “Interest” have been included when setting up Banks as follows:
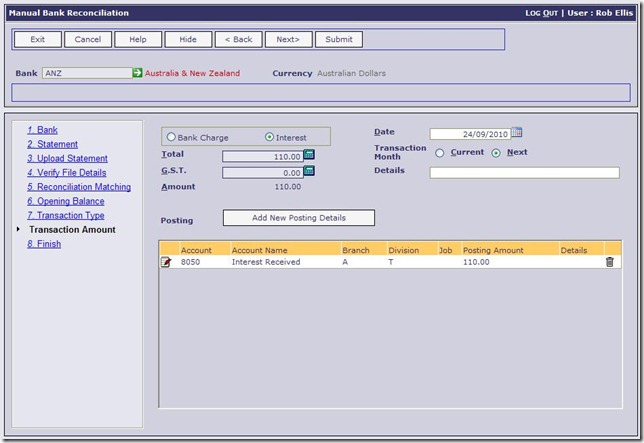
These defaults are used in the Bank Charges posting automatically using the radio buttons as per the screen sample below:
Along with these enhancements above, the ability to easily import the details of an electronic version of a bank statement, downloaded from your banking software, means that users can reconcile most of the items for a bank statement without the need to enter them manually. This is entirely optional in the Bank Rec system, but when used, these are the new steps that have been implemented:
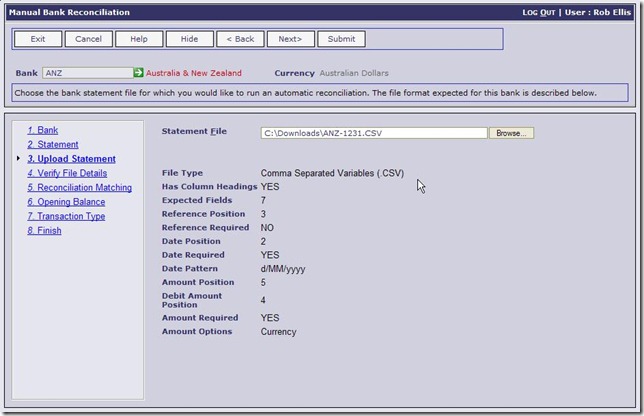
This step above is used to select the file with the bank statement details that are to be uploaded. Note that setting up the format used for each Bank you utilise is a once-off prerequisite step to this.
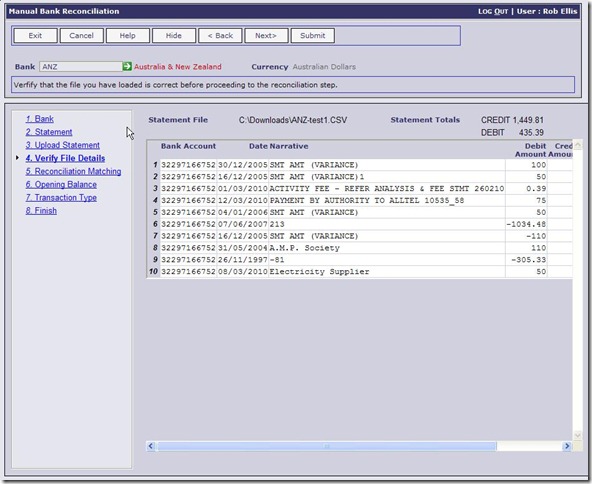
This “Verify File Details” step provides a visual of the details in the file that has been uploaded to allow confirmation that the correct statement is being reconciled.
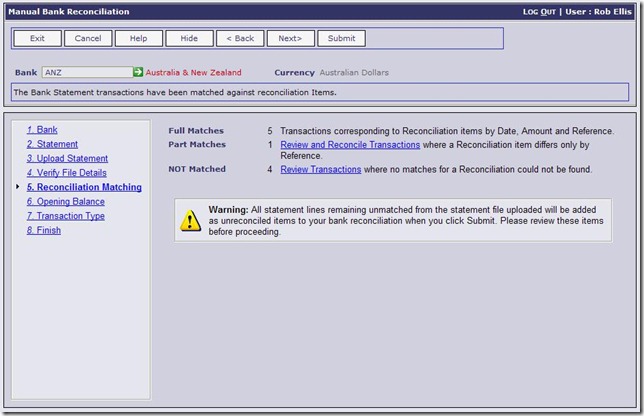
This “Reconciliation Matching” step will summarise what was found in the file uploaded. The items on the statement will fall into one of three categories as seen on the screen above.
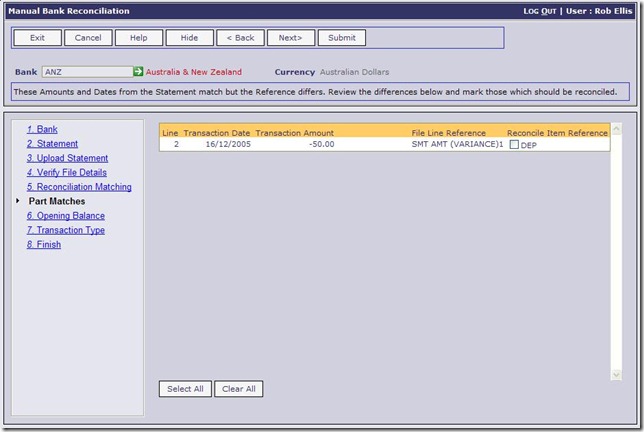
This “Part Matches” sub-step contains the details of items that have been partially matched to transactions on the system. As you will see from the sample above it also allows the user to use the check box (Reconcile Item) to confirm that the transaction on the system selected matches the item in the bank upload file.
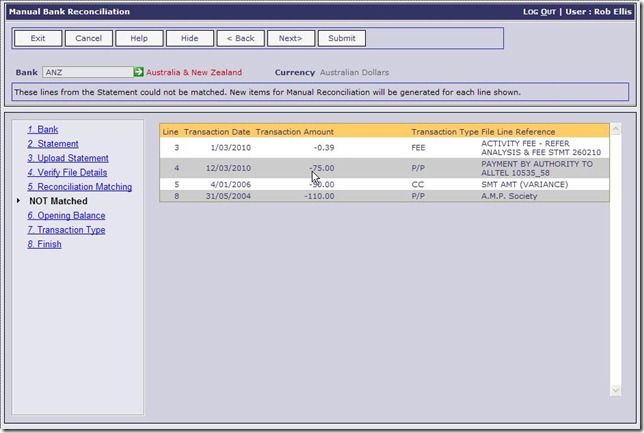
The sample screen above highlights the items that could not be matched in any way with outstanding bank transactions on the system. This is for display only. These items will also be shown in “RED” as part of the main transaction selection and editing function as previously shown in the first screen shot.
