Purpose
This procedure is used to add or change the details of Product Indexes held on the system.
Product Indexes are used in OA for a number of reasons, but mainly as an alternative way of navigating your products in a structure that is more flexible and adaptable than the more rigid structures of Product Categories and Groups. Indexes allow users to navigate your entire product range without any 1st hand knowledge of the items included, or any need to know part numbers or product descriptions when doing searches.
The Product Index system is built and navigated as a “top-down” structure. At the top level of the structure is a fixed, in-built “root” level. The indexes below the “root” level are completely variable and user-defined. The structure is essentially infinite in nature and scope, only limited by the imagination, and the benefits you will receive from the work required to create it. Each level in the structure is a new index. You can create as many indexes as you need. This means that you can have/create as many levels as you require, and the levels can go as deep as you require.
One good way to think about Indexes is to imagine they are like an Index to a book, or perhaps the Index to a Price List or Product Catalogue that you hand out to customers. Like an index to a book/publication, they assist the “user” in finding the product they are looking for. However the big difference with OA Indexes is that an individual Product can be on many indexes at one time. This provides you with the ability to give your users and customers multiple ways to find the same product.
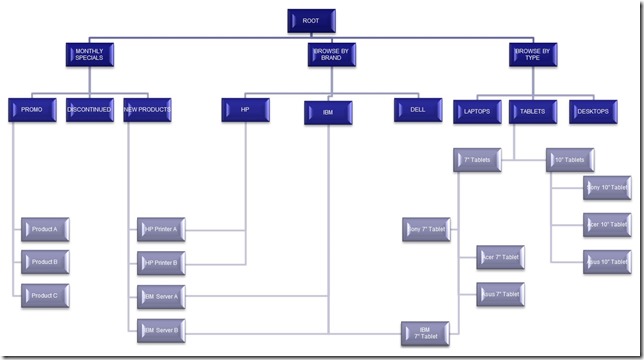
Here is an example of a Product Index structure based around a company selling computers:
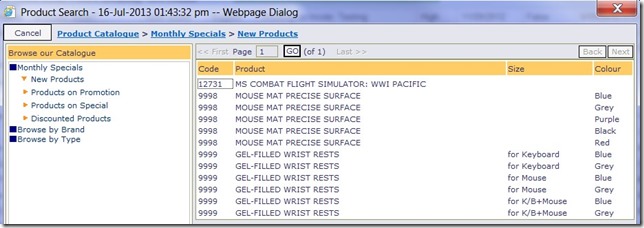
Once you have set up some Product Indexes and assigned them to individual Products (using the Product Details form in Inventory Setup) users in the OA system can use the ”Product Walker” function ![]() from the 2nd Icon at the Product prompt when looking for products. Clicking this Icon will launch the Product Walker as per the screen below:
from the 2nd Icon at the Product prompt when looking for products. Clicking this Icon will launch the Product Walker as per the screen below:
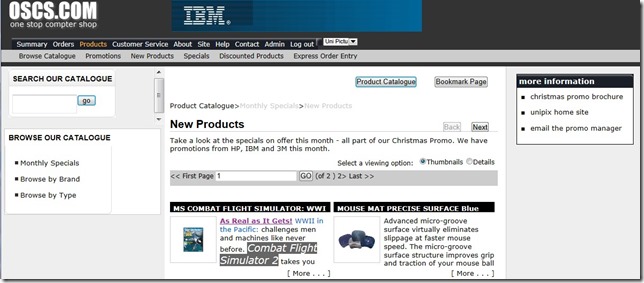
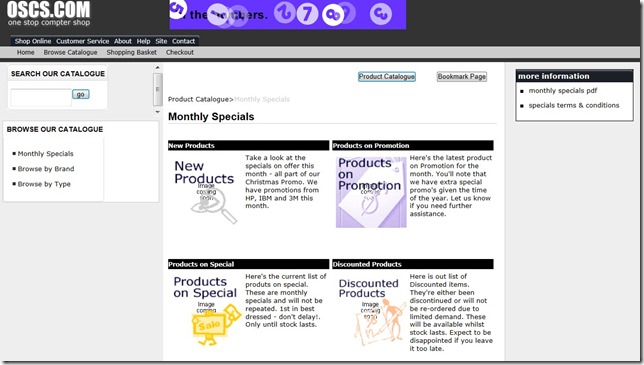
For those people who use the E-Commerce suite, these Indexes become the main Product “Catalogue” structure for the B2B portal and B2C web sites. When used on the E-Commerce suite they provide your customers with a view of your whole product range. The Indexes set up become the main navigation tool used in the E-Commerce systems. An example of Indexes at work on a site is below:
Data Input
Step 1 – Index
Index Code
Enter a new, unique Product Index Code – up to eight characters, that does not already exist on the system. You may also select an existing product index for editing. Note: The index code ‘ROOT’ is reserved for the top level of the index hierarchy.
For details on the use of “codes”, see The Role of “Codes” in Online Advantage
Return to the Top
Step 2 – Details
Index Name
Enter the index name. This is a mandatory field. The name is used to describe and identify the index. It appears to the user when using the Product Walker (as above) and on the E-Commerce systems (also as per image above).
Parent Index
Enter the parent index code. This is a mandatory field.
Parent index code is required as the indexing works in a hierarchy or tree structure. Thus when creating your indexes, you must layout your structure first, and enter the codes from the top down in order to be able to enter the Parent Index Code here. For Indexes at the top level, their Parent Index Code entered should be “ROOT”. This is a reserved word for the top level index. (Parent index is not mandatory on the ROOT index).
Return to the Top
Step 3 – Web Details
Exclude from E-Commerce Menus
Select whether you wish to exclude this product index from the E-commerce systems. You can use this flag where you want to have an Index set up for internal use, but not for use on the external E-commerce systems used by your customers. You might also use this setting temporarily on an index whilst you set up all the products and their details relating to the index, and then “release” by removing the flag.
Image Name
Each Index can have an image associated with it. This image is used in the E-Commerce system as a “thumbnail” for browsing the product catalogue with a “visual” interface. You can select an image from your PC by clicking the “Browse” button. The selected image is uploaded to the server for future use. If there is an image name already entered, click on ‘Upload another file’ to make the Browse button available again. Alternatively you can “record” the image name to use for this Index by typing the file name in at the 2nd prompt. (You need to include the file extension of the image – all common graphics file types are supported). Using this method does not upload the image to the server. You can upload images in bulk at some other time using the Remote File Upload Tool.
Web Description
Enter a longer web description for the product index that can be used on the E-Commerce systems to describe the contents of this Index. This description will appear in a number of places in the Product Catalogue to assist users in their selection. You can even use this description for additional notes or messages to your customers.
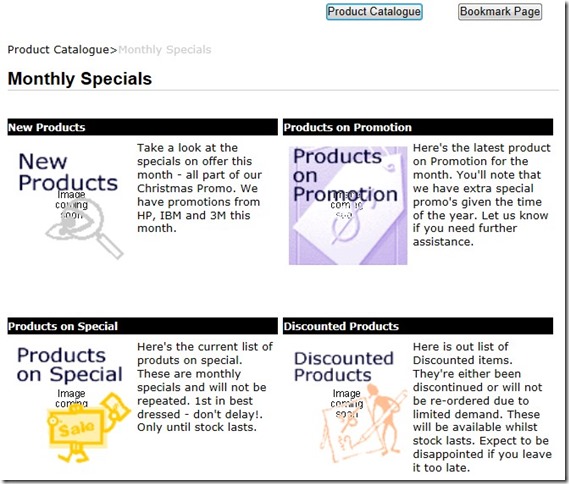
Below is a sample from the E-Commerce system showing how the “Image Name” and “Web Description” are used within the Product Catalogue:
Catalogue Display Format
 Select the display format of the catalogue on the web; either in “Detail” or just as “Thumbnail”. The “Detail” format shows each product in a row with “text” details as shown here:
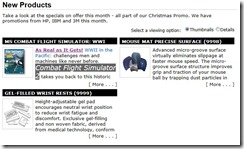 The “Thumbnail” format shows the product image and web description in a summary format which is a more visual way of browsing the product range but it does mean that you need to have an appropriate image for each Product in the Index in order for it to present well.
Step 4 – Web Links
Web Label
The E-Commerce system allows you to display links against a Product Index so that you can publish additional details about an Index. The additional details can be shown in any of the commonly used formats supported by internet browsers and the platforms that people run browsers on. This basically means you can publish a vast range of information in an almost unlimited range of formats. At this prompt you enter a description that will be used as a text “link” on the E-Commerce site. The entry made here will appear on the web page and when it is clicked it will trigger the ‘Web Link’ that sits behind the ‘Web Label’.
Web Link
At the “Web Link” prompt you can enter a link to any one of the many supported internet browser file types or internet links. For example:
- URL – a link to your web site or to any web site page you wish. You might link to specific pages on your supplier’s web site, or to the original Manufacturer’s web site where they maintain full product details e.g. www.onlineadvantage.com
- FTP – a link to an ftp site that you run, or to an ftp site that one of your supplier’s keeps up to date e.g. ftp.onlineadvantage.com
- Email – a link so that users can email a contact/brand manger in your organisation. Note you can vary the email address shown here by Product Index, Product etc. so that emails are directed to specific brand managers e.g. mailto:support@onlineadvantage.com or a 2nd example where the email “Subject” is pre-filled for your client already mailto:support@onlineadvantage.com?subject=Product 9999 10” Tablet
- Image Files – any valid file type can be linked to via the E-Commerce system as long as the file is uploaded to the server for use. Common files to use are graphics or picture files to show images of the products. You can use any of the “standard” image file types used on the internet including GIF, TIF, PNG, and JPG/JPEG
- Document Files – you can use “document” file formats to publish material. Adobe Acrobat’s PDF format is a common and very useful file format, but you could also use “Word” style formats like DOC, DOCX, RTF, and also “Excel” formats like XLS and XLSX as required. A great way to provide customers with access to all sorts of material like specifications, safety and handling details, instruction manuals, brochures, flyers, pamphlets etc.
- Video – linking to video files is a great way to showcase products or ranges of products. You can link to all the common video file formats
At this prompt you can select the required item by clicking the “Browse” button. The file will be uploaded to the server at the same time for future use. Alternatively, you can “record” the file name to use by typing the file name at the 2nd prompt, complete with file extension, or type in details or a link to a web site, ftp site or email link. You can upload images or documents at another time using the Remote File Upload Tool.
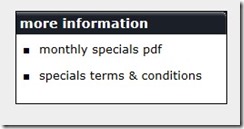 You can enter more than one “Web Link” per product index. These “Web Links” are entered in a “list” format, with each link being a “row” on the list. The input made at these two prompts are a “pair” that will be used to create a web page link within the E-Commerce Product Catalogue as shown here in the “more information” image. Users can then click on the link to view/read the details of the item you have published. Simply enter the label and link details and click Add to add the web details to the list.
When customers view this Product Index they will see any “Web Links” on the page as shown above and below in the “more information” section of the Product Catalogue page – which automatically appears when these links exist for the Product Index being shown:
