In this release the following improvements to the reporting functions in Online were made:
Report Designer – Watermarks
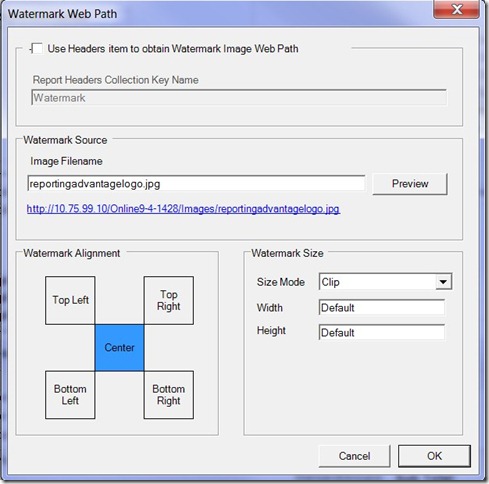
The ability to include a watermark image on a report has been added to the Report Designer. This allows users to customise their documents, either as a one-off, or regularly, with an image that appears in the background of the page. To add a Watermark, all the user has to do is upload the image file to OA (or email it to support to upload for them) and then nominate the watermark file name as follows:
As you can see, we’ve implemented a “Preview” button to allow users to see the image in their browser. Basic alignment and size information can be set, along with settings to clip/stretch or zoom on the image.
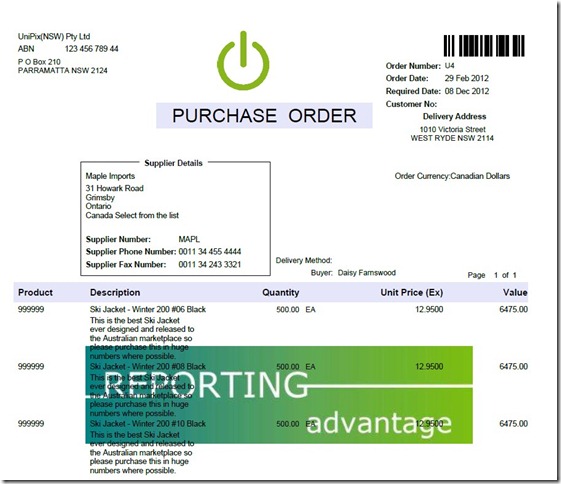
Below is an example of a watermark placed on a purchase order. We have selected a bold image on purpose so the watermark is obvious but the image style and look is entirely up to your discretion.
Report Creation – New Features
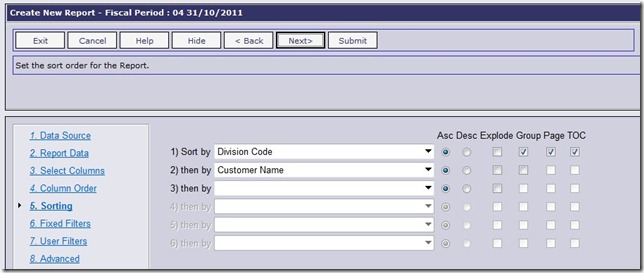
A number of new features have been added to the system when creating new reports to enhance the initial layout that is automatically generated for a new report. The most obvious change relates to the ability to tell the system what “columns” are to be used to generate “group” sections on the reports. This is done via the “Sorting” set as shown:
As you can see, there are three new check-boxes against each column being sorted on the report. The “Group” prompt will, when checked, create a “group” section Header and Footer on the report automatically, and place the details of the column in the Header section. Any columns with numeric data will also automatically have totals inserted into each “group” section on the report. There is also a “Page” option to allow the user to nominate a new page should be thrown at the end of a “Group”, and a Table of Contents (TOC) prompt that will automatically add this column into the reports TOC for navigation use in viewers like Acrobat PDF.
As well as the change to group sections described above, a number of smaller enhancements have been made as follows:
- Improvements to calculation on default widths and heights of columns
- Header and Footer sections set to “Can Shrink” by default – saves report space
- Column headings for “Detail” items automatically added to the “next” section above
- Grand-Totals automatically added to Report Footer
- “Repeat Style” added to “On Page” for all Group section headers so column details will show in event the details spans more than a single page
Report Writing – Mandatory Filters
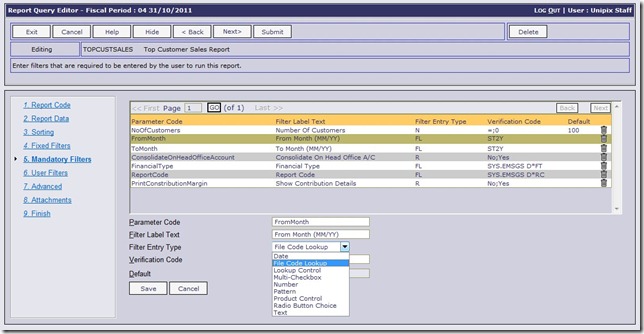
When writing or editing report queries, users can now set “Mandatory Filters” on a report. Mandatory filters are “questions” that any user running the report must answer in order to run the report. As part of the set-up of these new filters, the ability to “validate” the data input by the user has been included. This means that prompts can be added to the filtering process that will allow users to easily select from drop down lists, or input dates using calendars etc. to ensure the answers they are giving are accurate before running the report. Here’s a sample of the report editing function where these filters are setup:
As you can see from the above screen, we have included a variety of difference input types for data entry and validation. This is a great way to ensure users answer the important questions before running reports. The existing “User Filters” for a report will still function, assuming there is no duplication of filters that would clash, and so users can further their selection process once the mandatory filters are entered.
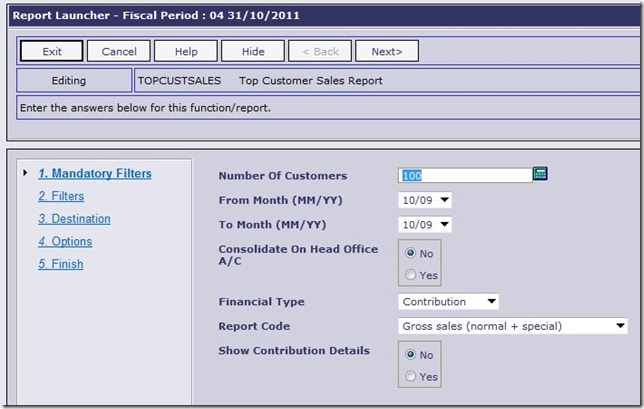
When a report is run that has “Mandatory Filters” setup the report launch process will automatically include these as part of the runtime process as shown in the following example:
Force “Direct” Printing
 The inclusion of some new printer destination and user settings now allows system administrators to setup the system for users so that selected “documents” will print directly to a pre-determined printer destination without intervention. The goal here was to save the user the time required to confirm where they wanted to print certain documents.
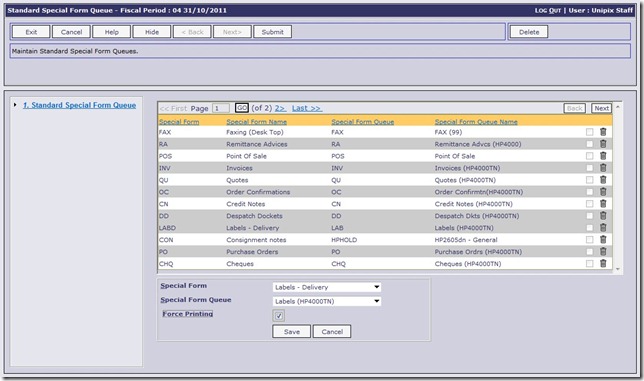
A good example is labels, which are often directed to a dedicated label printer and the users within a branch/warehouse have little or no choice about where to print them. In this situation, a rule can be established so that the print is “forced” directly and without additional confirmation. There are system wide settings for this “force” flag per document type as follows:
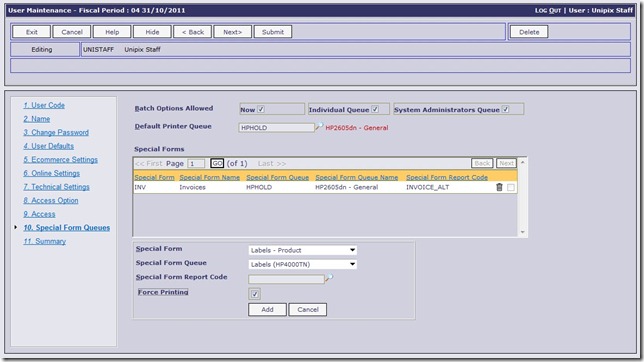
These settings can then be specified on a user by user basis as an override to the system wide settings above. Therefore those companies with different teams of people working in different physical locations (either factory, warehouse, office or branch) can set-up completely different rules on a user by user basis for printing defaults and the forcing of documents to print a specific devices as follows:
