![]() There are many hundreds of “Display” functions in Online Advantage that are used to view information held in the system based on some “known” details. There are so many of these display functions because where you start an enquiry depends entirely on the situation, and what you may know to begin with. All the display functions in the system operate in the same basic way and provide the same features.
There are many hundreds of “Display” functions in Online Advantage that are used to view information held in the system based on some “known” details. There are so many of these display functions because where you start an enquiry depends entirely on the situation, and what you may know to begin with. All the display functions in the system operate in the same basic way and provide the same features.
The Display functions are designed to present a ‘read only’ view of your data in a generic format so that users are always comfortable on how to navigate the screen. Presenting the data this way also means every display has a consistent look and all the same features are available across the various modules and functions. Below is a sample screen shot of a Customer Display:
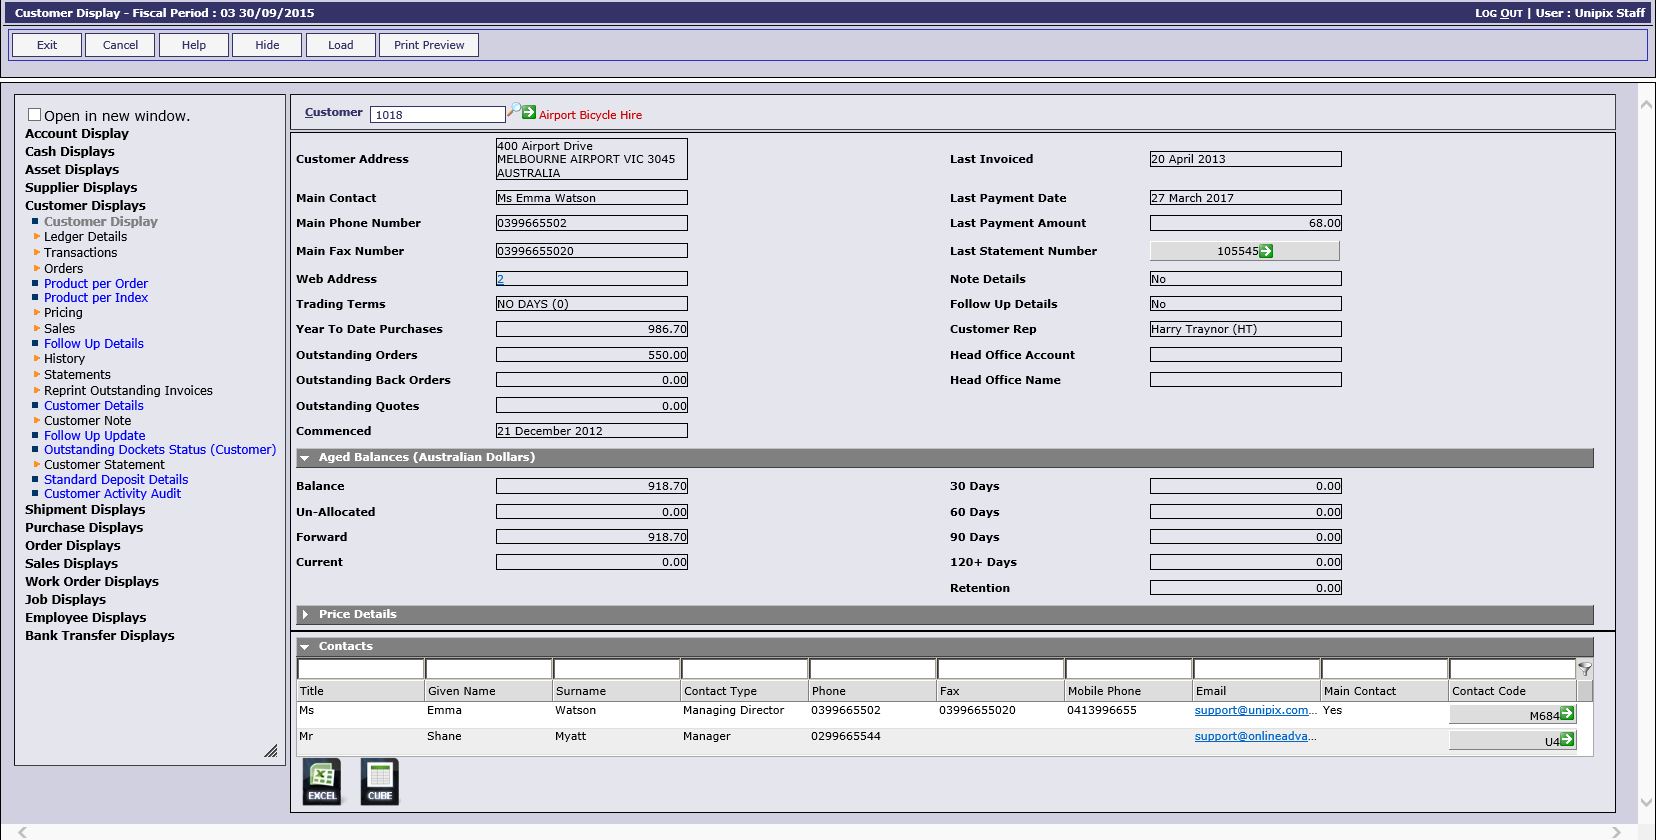
The sample display above has four main sections which are each described in detail below:
Data Input Area
 All display functions require at least one input before they will show information relating to the area selected. In the Customer Display example this is the input of a customer code. However other displays require two mandatory inputs before anything is shown. There are also display functions that have two inputs but they are optional so you can choose which one to input on. At any point whilst using a particular display function you can change the data that has been input in the function to change the details you are viewing. The standard system features for finding and searching data are available to assist with these displays where appropriate. Use the ‘Load’ button to refresh the data currently being viewed. Use the ‘Print Preview’ button to view and then optionally print the display information.
Flat Data Display Area
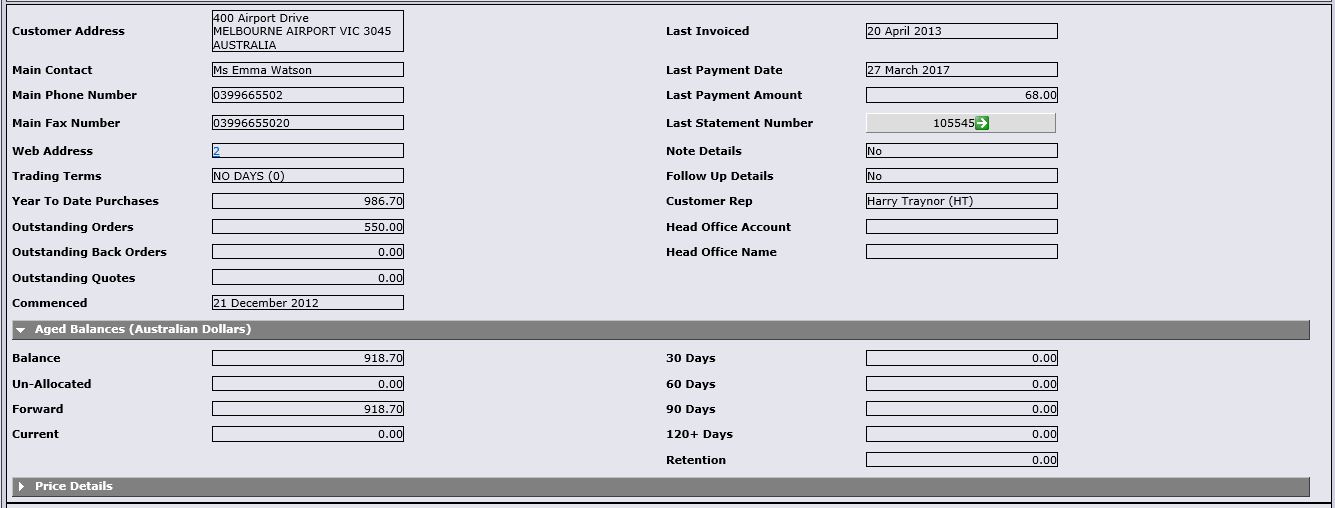 Some displays (like the sample Customer Display) are divided into one or more sections. The top section(s) show information that is singular or “flat” i.e. there are not multiple or repeating occurrences of the data. This type of information is displayed in a column format and where there is more than one it is grouped into collapsible sections with an appropriate heading. There are some display functions that do not have this top “flat” data section at all. Also worth noting that some display functions only have “flat” data sections.
List Data Display Area
![]() The bottom “list” data section of the display is reserved for viewing data that is not singular i.e. it has repeating occurrences of similar but different data in a row and column format. This is also referred to as a grid, or “grid” data. The system provides navigation functions to scroll through the list as required. There are some display functions that do not have this “list” data section at all. There are also other displays that are entirely made up of a list of repeating data like this like ledger items and transaction lists.
The bottom “list” data section of the display is reserved for viewing data that is not singular i.e. it has repeating occurrences of similar but different data in a row and column format. This is also referred to as a grid, or “grid” data. The system provides navigation functions to scroll through the list as required. There are some display functions that do not have this “list” data section at all. There are also other displays that are entirely made up of a list of repeating data like this like ledger items and transaction lists.
Online Advantage uses a standard way to show and navigate this type of list. One of the most important features that should be noted is the ability to click on the column headings on a list. This causes the display to re-sequence the rows based on either an ascending or descending sort sequence using the data in each row of the column selected sorted. Simply click the heading to toggle between ascending and descending sorting.
Besides being able to sort a column by clicking on its heading, other navigational features available are:
- Filtering – for example, enter a reference you are looking for in the box above the reference column and click on the filter button on the right hand side to search for that reference
- Grouping – right click on a column heading and choose ‘Group By’ from the menu. Rows of data are then grouped into collapsible sections based on the selected group criteria
- Columns – right click on any heading and choose the ‘Columns’ option from the menu and you can switch off any columns you don’t want to include in your current view
- Fit and Auto Fit – column not wide enough to see all the data? Right click on the column heading and choose ‘Fit’ or ‘Auto-fit’ to resize the column to the data width
- Adjust columns – you can manually resize columns by hovering near the right edge and dragging the column to the required width
- Move columns – you can re-position a column using a by left-click and hold on the column heading and dragging the column to the required position
- Sorting – right click on column heading and choose ‘Configure Sort’ which allows you to sort using multiple columns
- Pin – right click on column heading and choose ‘Pin’ to fix columns in position while you slide other columns horizontally
At the bottom of the list are two buttons available which can be used to export the list data as follows:
View in Excel – this exports the data to Excel so you can manipulate the data however you like in a spread sheet format
View in Cube – this exports the data to the Online Advantage Cube Viewer. You can then manipulate the data in the Cube Viewer to view the data how you like
Other Features
You should also notice that in the Customer & Supplier Contacts lists often show email addresses. You can click on these in the display to invoke an email message to that address via your default email client. You can also click on web site links to navigate directly to the address clicked.
Sidebar Navigation Area
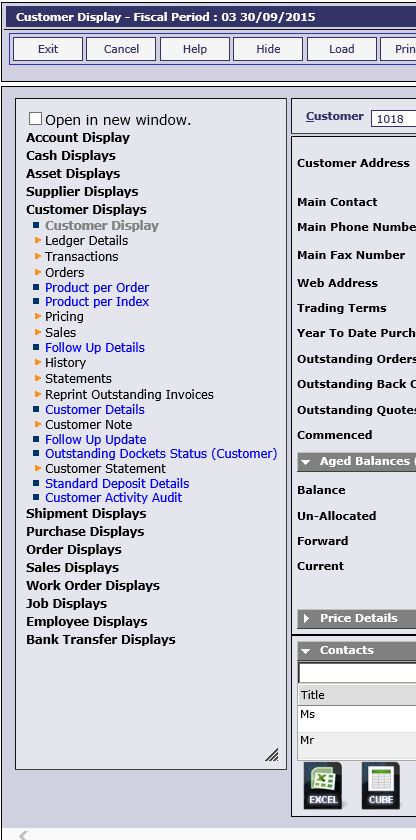 On the left-hand side of the screen is a section that can be used for navigation to other “related” display functions, or to launch any other display function that you have access to in the system as required. You can simply navigate up and down the “tree” menu structure where all the displays are published and click on a selected display to launch it. Depending on the setting in the “Open in new window” option at the top of this section any new function will either replace the existing display or be launched in a new window/tab in the browser.
It should be noted that you can “Hide” this sidebar navigation at any time to provide more screen space to show the data.
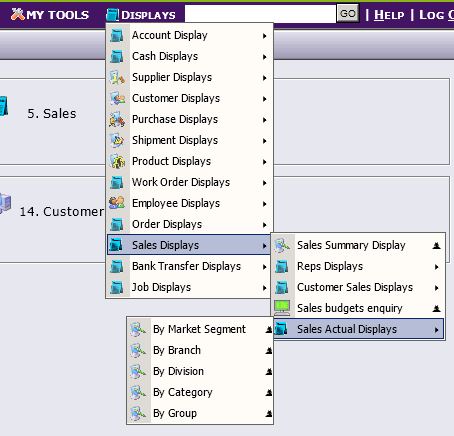
Main Menu Displays
Also worth noting that all the display functions are published within each module and also accessible using the context-sensitive “green arrow” drill-down menu function available on all data input forms and display functions in Online Advantage. You can also access the list of available displays from the “Displays” menu published on the Main Menu as follows: