In Online Advantage we deliver each data table (or file) with a set of search fields. The search fields we select may not be the ‘best fit’ for everyone, so this document explains how you can add your own search fields or re-arrange the existing search fields.
There are 2 types of searches in OA; the Simple search, and the Advanced search.
The image below shows the Simple search. This is the search presented at the start of each form. Notice that the sequence of the search fields in the drop down list is the same sequence as the columns across the page.
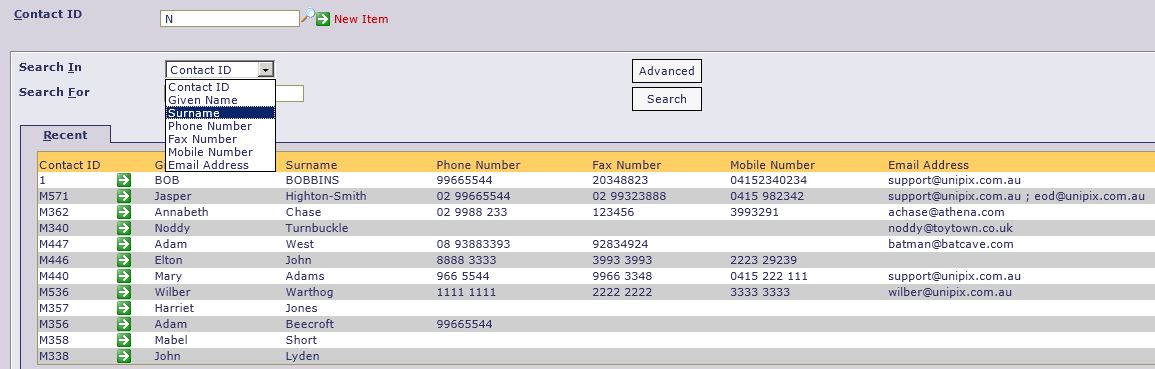
Clicking the ‘Advanced’ button gives you the same search fields and usually a few more.
To add a new search field, or to simply re-arrange the sequence of search fields, you use the Table Details function. This can be found on the Software Utilities > Table Tools menu.
You need to select the table/file you are searching on (if you don’t know it – use the search option to find it!).
Go to the Dictionary Details step, and choose the field you want to search on from the grid. You will see an edit page like the one below.
Make sure the ‘Searchable’ checkbox (as highlighted below) is ticked. Then click Next to save that change.
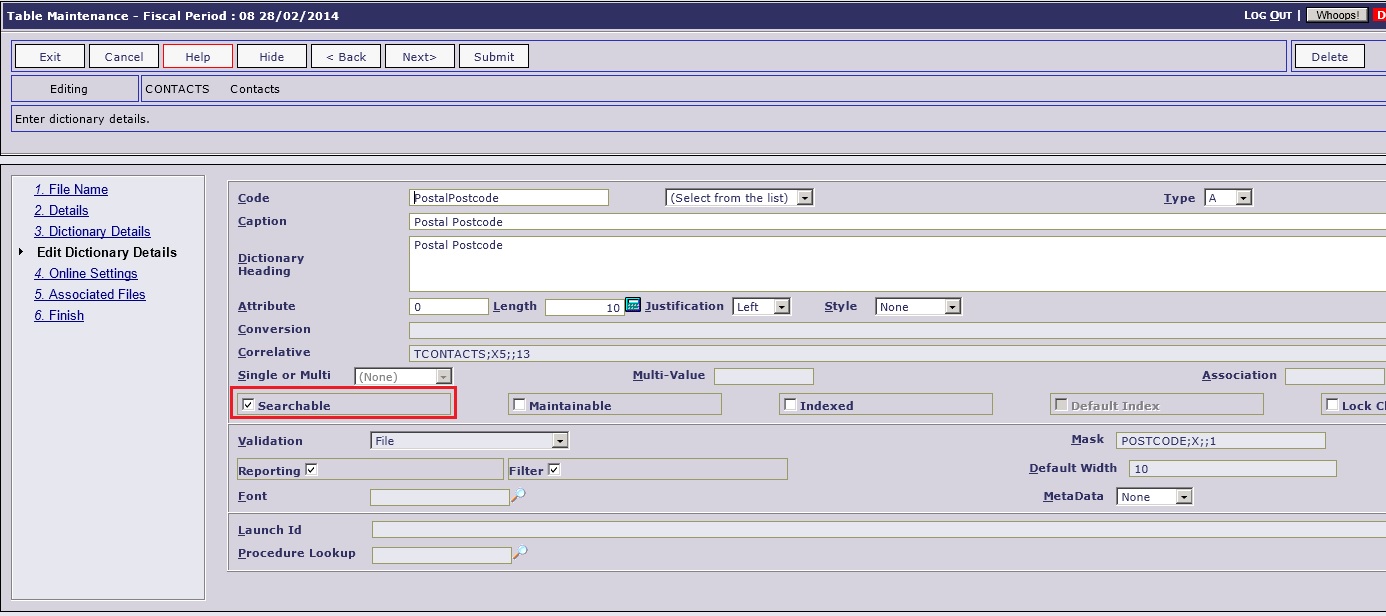
Then move to the Online Settings step. The ‘Display Dictionary Code’ drop down list contains all the fields on the file with the ‘Searchable’ checkbox ticked.
Choose your new field here and click the Add button to add it to the list.
If you want to re-arrange the sequence of the search fields, simply use the up and down arrows on the left of the grid.
Once finished, click Submit to save changes.

Now go to the form you are updating and test your change!
Note on Advanced search: The advanced search gives you all the fields marked as ‘searchable’ , not just the ones set up for the simple search.