Purpose
The Print Product Labels function allows you to select items in inventory and print a sticky label to attach to your products. The default Product Label delivered with Online Advantage obviously isn’t going to suit everyone. There are just too many different types of label stock (papers quality, size, perforation etc.) available to have a generic solution to cover all needs.
There are also many different way to encode barcodes, being the actual format or style of the bar code e.g. EAN, ANSI39, Code 2 of 5, Code 128 etc. ) assuming you are planning to use barcode reading technology. The following is a guide on how to configure Product Labels in OA.
Step 1 – Product Label Layout
Under the Online Tools > Reporting Tools menu, select the ‘Open Existing Report’ function and enter the report code: PRODUCTLABELPRINTING
Use ‘Launch the Print Layout Designer’ and set the layout of the label as required. (If you don’t know how to do this, contact support@onlineadvantage.com.au to organise some training or request the label be modified for you).
Save changes and test.
If you have only 1 size label, then there is no need to read further.
If you have alternate label sizes, then in the ‘Open Existing Report’ function, click on ‘Create a Copy of this Report’. Create a duplicate layout and give it a new name. Make the name meaningful e.g PRODUCTLABELPRINTING-W for wide labels, or PRODUCTLABELPRINTING-B for big labels. It doesn’t have to start with ‘PRODUCTLABELPRINTING’ but when you are searching for all your product label print layouts at a later time, it is useful to have the report codes similarly named.
Use the Layout Designer to adjust the format for the new label.
Create a new label format for each product label you have – you can configure label printing to have up to 5 print format options.
Return to the Top
Step 2 – Configuring the options
Once you have the label print formats ready, you need to set things up so the various label format options are available in the Label Print function.
Go to the System Manager > System Setup > Product Format function.
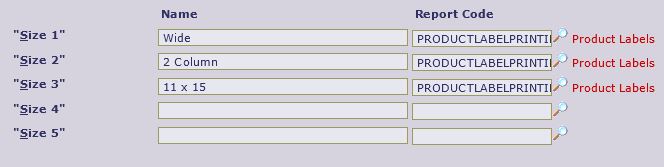
In the Label Options page, enter up to 5 label format options to be used in the Label Print function.
The options are entered as name-report ‘pairs’. For example, the name might be ‘Wide’ and the report might be ‘PRODUCTLABELPRINING-W’.
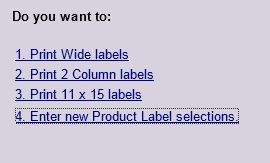
On the Product Label function, the name is prefixed with ‘Print’ and suffixed with ‘labels’, so the user will see ‘Print Wide labels’