Purpose
This procedure is used to enter or adjust the details of Customer Returns that are used to raise Credit Notes in the system. Credit Notes are for processing returns from customers where products are returned to stock, or for damaged goods that are usually written off from inventory at the same time as processing the return. Credit Notes can also be used for price adjustments where a customer has been charged an incorrect selling price and a credit amount needs to be added back to the customers account.
Price adjustments – enter the product with a positive quantity and price, then enter the product a second time with a negative quantity (the same quantity) and a negative price. The end result is a credit value with zero stock movement, but a movement in sales value for the price difference.
Data Input
Step 1 – Order Number
An existing Credit Order Number can be selected for editing from here, or a new credit Order Number can be created. You can manually enter a credit Order Number to create or allow the system to generate a new number for you by leaving the prompt with the default “N” for Next order number in place.
Return to the Top
Step 2 – Invoice To Credit
Invoice Number
If you are crediting a particular invoice, or part of a specific invoice, you can enter the invoice number at this prompt. The details from the original invoice are then used to fill in the details of the return to save the need for them to be entered manually. Any details from the original invoice can be then manually edited and adjusted as needed, before the new Credit Note docket is saved to the system. Note that you can even delete line items from the return docket so that only certain line items are returned if necessary.
If you don’t have a particular invoice to credit you can leave the invoice number blank and manually enter the relevant return details.
Reason for Return
At this prompt select the ‘Reason for the Return‘. This assumes you have previously set up a list of valid reasons for returning stock and creating credit lines. The two main purposes of entering a return reason are for analysis on returns, and to specify a write-off General Ledger account in cases where items being returned are damaged and should not be returned to inventory. You can set up as many Return Reasons as required to cover all the reasons needed.
Return to the Top
Step 3 – Customer
For an existing credit, you may edit the customer details. For a new credit, select the customer to be credited.
Customer Code
Enter an existing customer code to create the credit against. Upon selecting the customer code, the subsequent fields will be filled by default according to the customer code: Tax Certificate No, Issue Location, Currency and Delivery Address.
Change of Customer Checks
If you change a customer here an additional step in the entry procedure appears asking you to verify which customer the order details are to be obtained from – the original customer or the customer newly entered. These checks are necessary when the defaults from the original customer have already been loaded into the order, plus in the case of pricing the new customer may have a different pricing structure.
Tax Certificate No
Enter a tax certificate number for the return if required. This number defaults from the customer’s details if present. Credits entered with a tax exemption certificate are exempt from any ‘normal’ tax calculated on the line items. If you enter a different tax certificate number to the one stored on the customer’s details, you are given an option to update the customer details with the new certificate number for use on subsequent orders.
Issue Location
Enter the Stock Location to which the products on this credit are to be returned to Inventory. The Issue Location may default from either the Customer’s ‘Default Location’ setting or from the User’s ‘Default Location’ in that order of preference. The location used will determine how the system will derive the cost of the credit and where to record the inventory stock commitments and stock transactions relating to the transaction.
Currency
Select a Currency where you want to use/show pricing on the credit in a currency other than local currency. The currency will default to the currency held against the Customer’s details, if there is one. If you choose a currency other than local currency you need to enter the exchange rate to use for the docket. The exchange rate will default to the current system rate for the currency selected held in the system at the time.
Delivery Address
The delivery address for the customer is displayed here for verification. You cannot change the delivery address at this step, but you can adjust it later in the Other Details entry screen. In the case of a Credit Note, this can be the ‘pick up’ address for the return.
Return to the Top
Step 4 – Sale Item
To add a new line to the credit, choose the type of item you want to add. If you want to insert a line into an existing list, enter the line number to insert at before choosing the item type. Click on an existing item in the grid to edit and change details for that line. 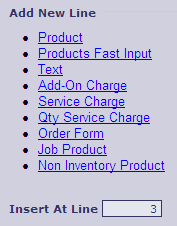
Option: Product
Select this option to add a product to the credit. For full details on how to add a product via this sale item type, refer to Add Product to a Sales Order
Option: Products Fast Input
Select this option to add a product to the credit via a faster input method than the ‘Product’ input option. For details, refer Add Products via Fast Input
Option: Text
Select this option to add a text only line to the credit. For details, refer Add Text in Sales Item
Option: Add-On Charge
Select this option to add a value-only charge to the credit. For details, refer Add Add-on Charge in Sales Item
Option: Service Charge
Select this option to add a service charge to the credit. For details, refer Add Service Charge in Sales Item
Option: Quantity Service Charge
Select this option to add a service charge with a quantity to the credit. For details, refer Add Qty Service Charge in Sales Item
Option: Order Form
Select this option to add items to the credit using an Order Form template. For details, refer Add Order Form in Sales Item
Option: Jobbing Product
Select this option to add a jobbing product to the credit. For details, refer Add Job Product in Sales Item
Option: Non Inventory Product
Select this option to create a non-inventory product on the fly and add the new product to the credit. For details, refer Add Non Inventory Product in Sales Item
Discount
You can use the Discount option to apply a discount % to all items on the credit, or just those items that haven’t changed.
Reason For Return
On the main item entry you can select the ‘Reason for the Return‘. Use this if you want to quickly change the reason for return on all credit line items entered so far. It should also be noted that each line item can have a different reason recorded against it as required. Since the reason for the return can affect the postings made by a credit, it is important to get the correct reason details recorded on each of the line items being returned. Whilst a return docket can have a ‘default’ reason, this could be overridden especially where the reason for return can determine if the stock is actually returned back into the Inventory system i.e. Damaged stock returned by a customer.
Return to the Top
Step 5 – Order Details
Date returned
Enter the date the items will be returned, or the date they are expected to be returned. Note that returning items on a outstanding docket will affect the “Available” quantity of an Inventory item.
Credit Date
Leave the ‘Credit Date’ blank if you would like the date of the credit note transaction to be the same date as the date the credit is finalised on the system. If you would like to back date or forward date the credit, you can enter a date to use at this prompt. Note that the ‘Credit Date’ is the date used for debtors ledger ageing.
Customer reference
Enter any customer reference that the customer has provided to refer to this credit return. You can use the ‘Customer Reference’ to search for credits when required. This reference will also appear on any ‘Pick-up’ and ‘Credit Note’ paperwork printed from the system to assist your customer in identifying the transaction.
Customer Market Segment
The ‘Customer Market Segment’ is defaulted from the Customers details. You can change the market segment if required. Market Segment is used in sales analysis and reporting systems. In sales, there is a subtle difference between the ‘customer’ market segment and the ‘order’ market segment – the customer market segment is the market segment currently held against the Customer. The ‘order’ market segment is the market segment used at the time of processing an order/credit docket. Note that you may not select a market segment that has been flagged as ‘inactive’.
Sales Rep
The ‘Sales Rep’ is defaulted from the Customer details. You can change the sales rep if required. Sales Rep is used in sales analysis and reporting systems. In sales, there is a subtle difference between the ‘customer’ rep and the ‘order’ rep – the customer rep is the rep currently held against the Customer. The order rep is the rep used at the time of processing an order/credit docket. Sales Rep is also used when calculating rep commissions based on transaction history.
Order Class
Select a valid ‘Order Class’. Order Class is a method of categorising orders. For example, your order classes might be: Email, Fax, Phone, E-commerce, Store. Order Class is defaulted from the System Settings – Sales Order Class. For orders created from E-commerce, the order class is defaulted from the class set up for the corresponding system.
Credit ageing date
Enter the ‘Credit Ageing Date’ as an override date to use for the ageing of the credit note in the Debtors Ledger. Leave this prompt blank if you want to age on the ‘Credit Date’.
Return to the Top
Step 6 – Other Details
Delivery Area
Delivery Area is not applicable to credits.
Direct Delivery
Direct Delivery is not applicable to credits.
Drop Shipping
Select this option if you wish to use drop shipping. If selected, some additional inputs become available:
- Drop Ship Order Number
- Drop Ship Contact Name
- Drop Ship Contact No
The drop ship option defaults from the Customer Master details. The drop ship details are printed on the Return Docket and Credit paperwork.
Alternate Delivery Address
Alternate Delivery Address is not applicable to credits.
Notes
Enter any notes about the credit. These notes appear on the Pickup Advice document and the Credit Note document.
Address
Enter the delivery (‘pick up’) address for the credit. Delivery address defaults from the customer’s Master details. You may override the default delivery address by simply typing in a different address. If the address is likely to be used again, you may optionally add the address to the customer’s delivery address list.
Packing Notes
Packing Notes are not applicable to credits.
Return to the Top
Finish step and links
Finance
If the credit requires finance, click the Finance button to enter the following details:
- Cash Sale Name – this name appears on the Credit
- Address of the Finance company – this address is used for the Credit address
- Override Trading Terms – these terms override the standard trading terms configured in System Options. The terms appear on the Credit Note
Links
After submitting the credit, the following options are available:
- Print Pickup Advice – Use this link to generate a ‘Pickup Advice’ document that can be used by your driver when collecting returns. Print the Pickup Advice before printing the Credit Note.
- Print Credit Note – Use this link to print a ‘Credit Note’ from the return details. Once you use this option you may no longer go back and change details on the credit or print the pickup advice from this screen. Taking this action updates the customer’s ledger with the credit transaction and books any inventory back into stock as required, essentially finalising the transaction.
- Offset Account – Use this option to offset the newly created ‘Credit Note’ against an existing outstanding transaction(s) on the Customer’s Ledger. You can only use this option after the ‘Credit Note’ has been printed.
- Enter another Credit Note – this is the default option and can be used to take you back to the start of this function to enter a new credit note or adjust an existing return docket.